We have several tracking options which allow you to analyze the traffic performance right in your AdsKeeper dashboard. Some of them allow you to transfer additional data (for example, it might be conversion status or payout amount) from your affiliate network or a third-party tracker, which makes the campaign optimization process much easier.
1. Pixel (JS).
This option only works when you have access to the offer's page source code and you can implement the javascript code into it.
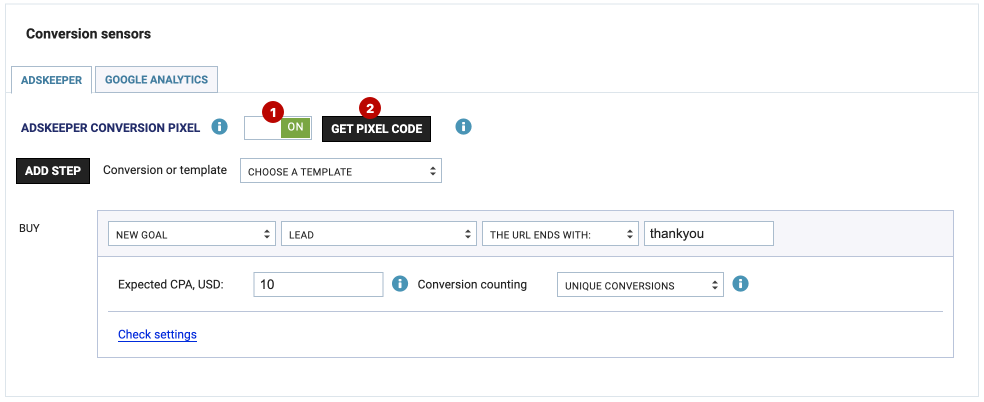
First, open the campaign settings in the Dashboard and scroll down to the bottom, activate AdsKeeper conversion sensor (1) option at the bottom of campaign settings in the Dashboard; then, get Pixel code (2):

Make sure that the Pixel javascript code is placed in the source-code of the targeted pages: starting from your Landing Page and all other webpages down to the Target page (“thank you” page, for example) of the promoted website. Here’s a tip – place the Pixel javascript code high up in the webpage’s body, it would help avoiding statistics discrepancies.
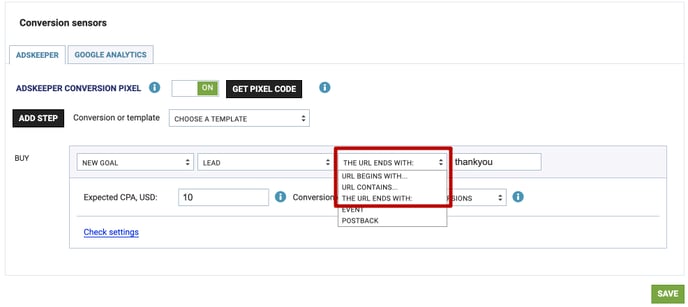
Don't forget, in order to receive performance statistics, you need to set up Goals and add them to the conversion settings section.
For example, by selecting URL Contains or URL Ends With options you can set Thank you page URL as a page final sale in your funnel will be tracked on.

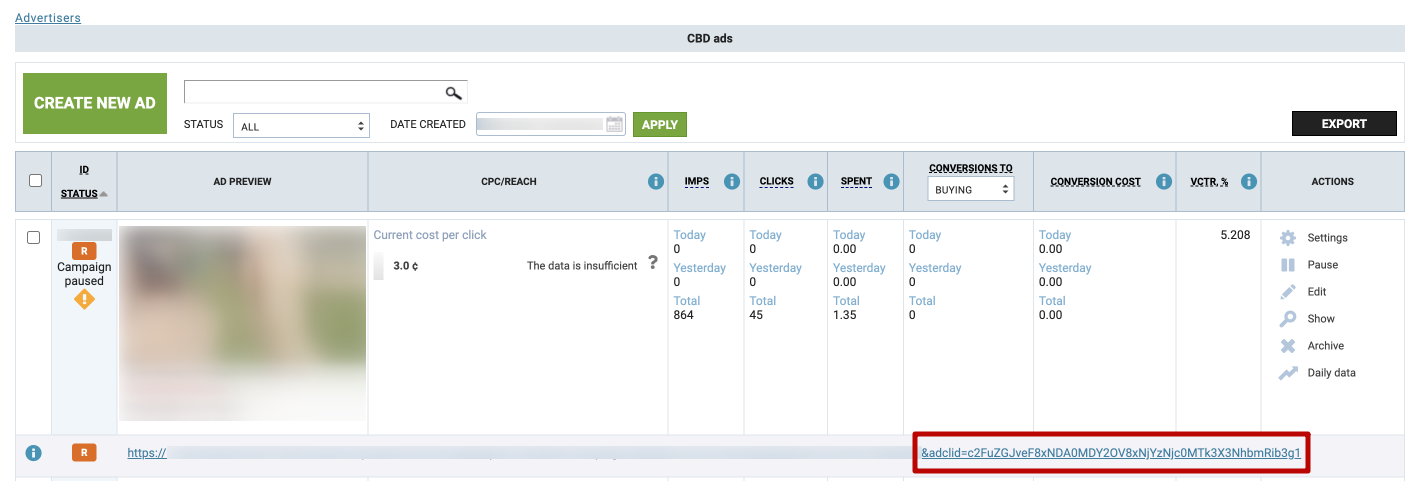
And last but not least, for proper stats tracking our parameter adclid is being passed on from your Landing page to the Target page (“thank you” page). This parameter is being added automatically by our system to transmit the click_id code. Make sure that the parameter and its variable (for example adclid=N where N stands for the unique click_id assigned by our system automatically) appears in URLs of all the webpages of your funnel — it’s the only way to receive performance stats with the Pixel tracking option. You may find the parameter here in the campaigns’ Ads menu, for example:

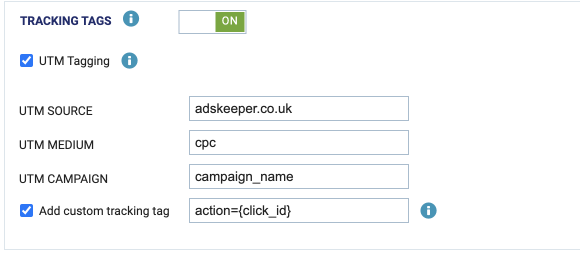
In case you have some specific parameter name for our click_id macro (for example, parameter name “action” on the screenshot below), our system will also automatically add our tracking parameter adclida which will be equal to your specific parameter name (like in case on the screenshot below, it would look like adclida=action).

2. Postback, S2S.
If you don't have access to the offer's page source code, you can use a third-party tracking system to control your sales/leads/conversions/subscriptions/registrations.
We need to pass the parameter c={click_id} in the tracking link. We use it to optimize the campaign's performance (increase/decrease the traffic from several sources) and you should apply that data on your side.
You can set a specific event in your system and pass the required data depending on the actions performed by the visitor. If the event is a "lead", we need to pass the following data to the URL https://a.adskeeper.com/postback:
c={click_id} + e=leadXXXXXX (where XXXXXX is your client ID) + r={revenue} (payout amount)
So approximate final look of the URL should be like this: https://a.adskeeper.com/postback?c={click_id}&e=lead111111&r={revenue}
Please note that macros may be changed depending on your tracker’s parameters — contact us for the details.
3. Google Analytics
To use these tracking integrations, all you need to do is follow such steps in the campaign settings menu:
- Enable the Tracking Tags and UTM Tagging (the tags should be filled out automatically when you’re creating the campaign; also, you may customize the available UTMs):
![]()
2. Choose the integration you need and just insert the appropriate email address.