![AdsKeeper_Logo_Help_Center.svg]](https://help.adskeeper.com/hubfs/AdsKeeper_Logo_Help_Center.svg)
Voluum Tracker Dashboard Settings
AdSpace Dashboard Settings
1. Start by creating (or editing) a campaign in the AdSpace dashboard.
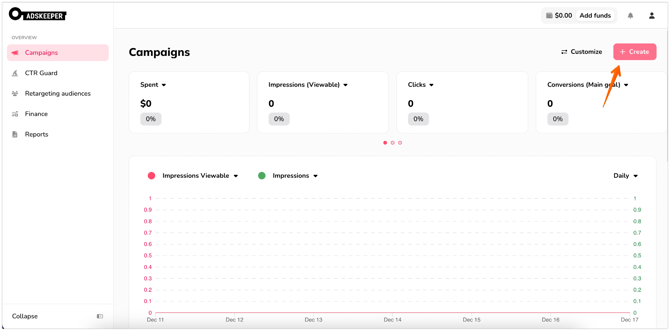
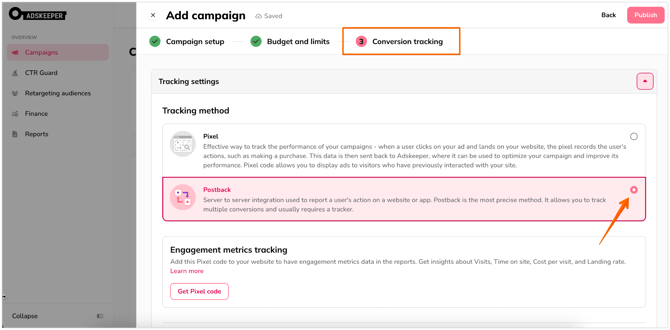
2. Choose the Postback option at the Conversion tracking step.
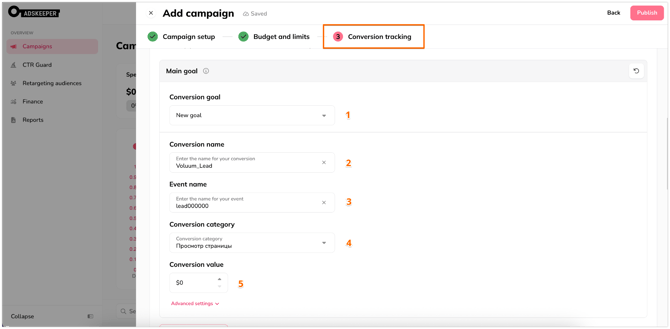
3. Create a conversion goal (choose new or select from the existing one):
- Goal Selection: Create a new goal or select an existing one from the list.
- Conversion Name: Enter a name for internal tracking.
- Event Name: Create a unique event name.
- Conversion Category: Select the appropriate category.
- Conversion Value: Assign a value if necessary.
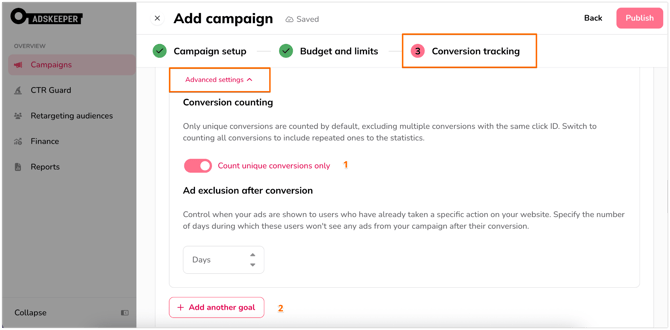
4.1. You can configure additional settings under the Main Goal, Additional 1, and Additional 2 sections.
4.2. Two extra goals are available for tracking different stages of your funnel.
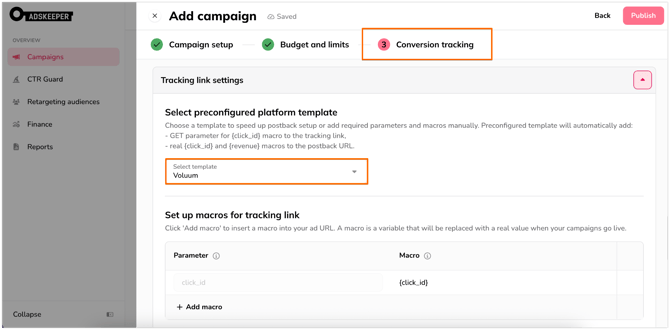
5. In the Tracking Link Settings, select the Voluum template.
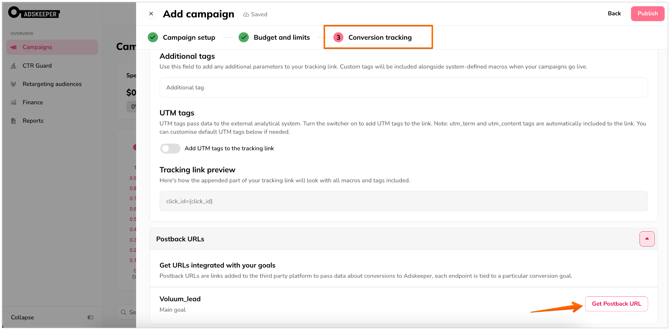
6. Click on the Get Postback URL.
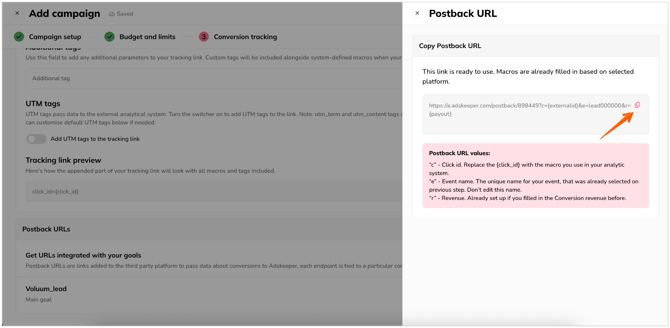
7. Copy the generated Postback URL. You will need this for the Voluum setup (follow the guide below).
Voluum Tracker Dashboard Settings
The next step will be creating a traffic source, campaign and offer on the Voluum side.
Follow these steps:
- Log into the Voluum panel to create a new traffic source.
- Click Tracker, Traffic sources and then Create Traffic source
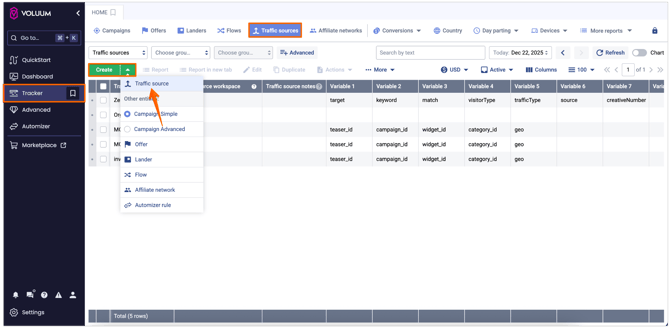
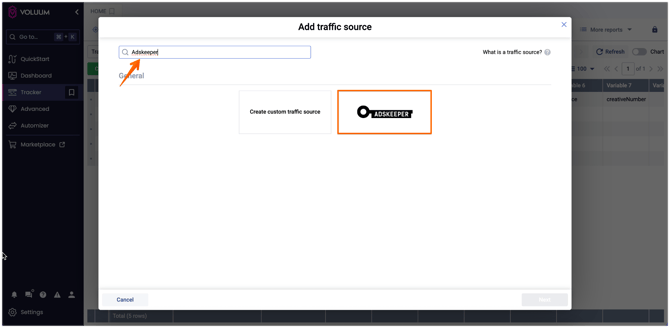
3. We recommend selecting the default Adskeeper traffic source template. Type “Adskeeper” in the search field, select the respective template and click Next.
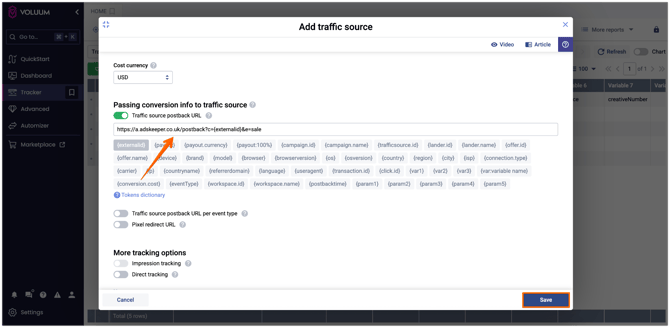
4. The final step is to fill in the Postback URL (the link that was copied while creating Postback goals in the AdSpace dashboard) with the correct macro for Voluum.
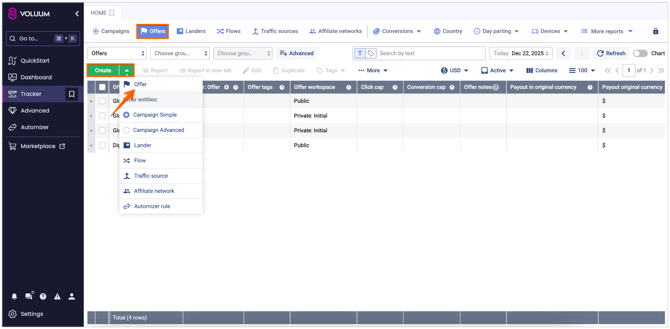
5. Create a new offer. Click Offers and then Create.
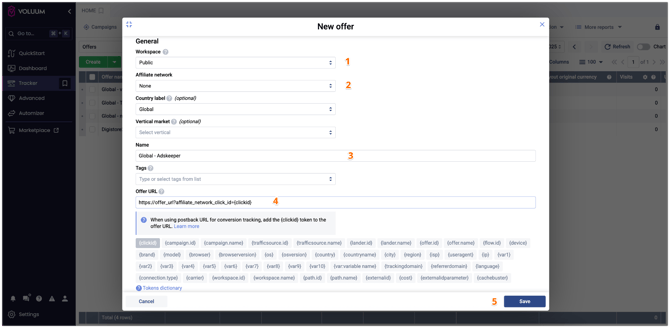
6. Fill out the following fields:
- Select Workspace
- Select Affiliate network
- Name Offer
- Insert Offer URL and add click_id parameter
- Click Save
7. Create a lander. Click Landers and then Create.
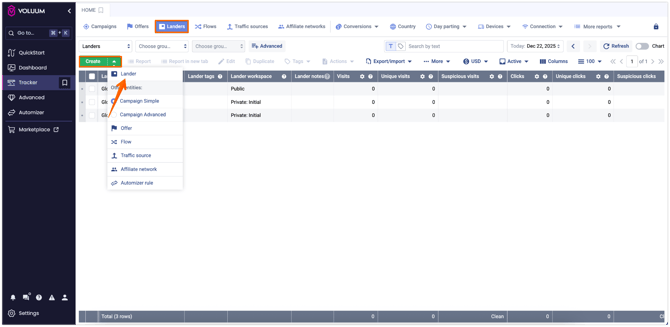
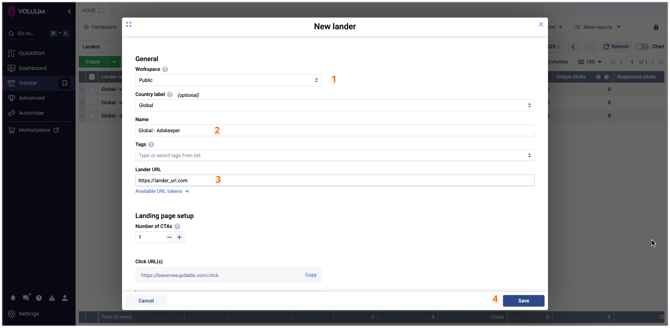
8. Fill out the following fields:
- Choose Workspace
- Name lander
- Insert lander URL
- Click Save
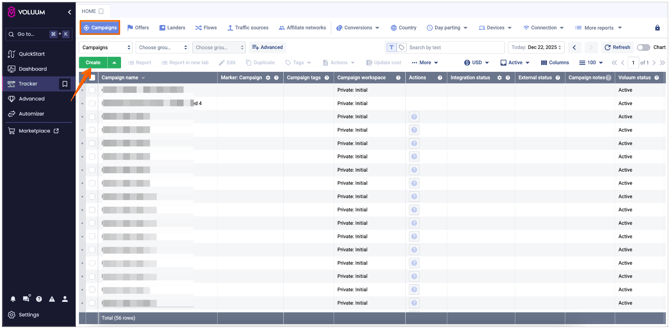
9. Create a new campaign in the Voluum dashboard. Click Campaigns and then Create.
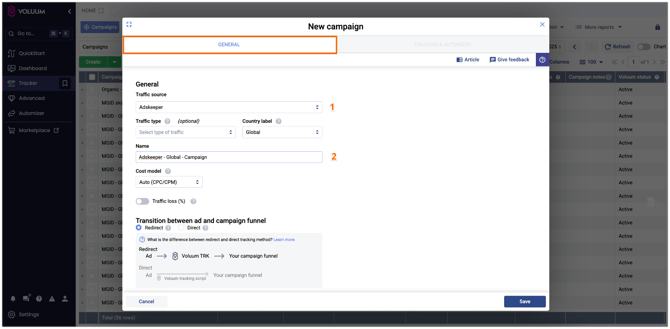
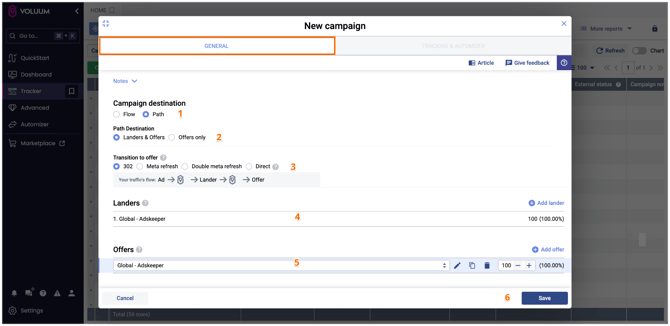
10. In the General tab, fill in the fields:
- Select Adskeeper as the traffic source
- Name campaign
11. Scroll down in the General tab:
- Select Path
- Select Landers & Offers
- Select 302
- Select the corresponding Lender from the list
- Select corresponding Offer from the list
- Save
12. In the Tracking&Automizer tab copy Campaign URL and use it for ad creation.
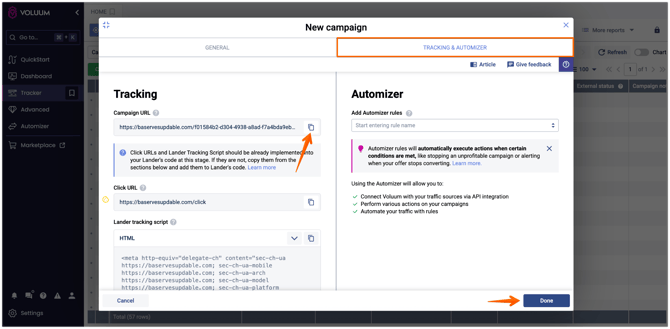
After saving the campaign, the link to the campaign will be displayed in the "Tracking & Automizer" tab.